
I was standing in line at the corner store just trying to be still. I’m pretty sure I was a ticking time bomb and the slightest nudge would have been catastrophic.
I had just walked half a mile with my groceries from a place that sells groceries to a corner store for a small bottle of tequila (for a recipe, so what!?) and to say that I was hot would be an understatement. I was steaming. The back of my hands were sweating. I mean… the back of my hands!
The man in front of me was diligently swiping his payment card and pressing the appropriate buttons when a woman enter the store just audibly exasperated. She was hot, too. I’m not sure of the exact status of the back of her hands, but I’m guessing… sweaty. The man in front of me looked up from his task and said to me, “Remember May in August”.
More steam rose from my head.
I’m not sure what kind of pleading panic look my eyebrows betrayed but he also said, “It’s hot, but it’ll be ok”, and then walked out with his groceries.
So… I guess summer is coming. I should hydrate. I should also buy more tequila.
I want to honor summer by adding cherries to my kitchen, but it feels like just a little too soon considering that a) cherries are still about a million dollars per pound, and b) I’m afraid that pitting super expensive cherries is just not worth the hand sweats. Also.. ew!
Here’s our ode to summer featuring frozen cherries. They come pre-pitted and the excess cherries can be used as an ice pack to beat the heat.
I’m afraid this isn’t going to be the last time we talk about the weather. It’s so real.
Let’s get at this quick!
Our butter is melting. I’m not even kidding.

We’re working all sorts of easy magic with these pie bars.
- We’re adding lemon to both the crust and the filling. Too easy.
- We’re making the crust work as both crust and topping.
and – Frozen Cherries… but we already talking about that sneak-attack.
If you’d rather use fresh cherries that’s great too!
Frozen cherries need a bit of tending to in terms of thawing, draining, and slicing.
Fresh cherries need love in terms of pitting and slicing.
This is a choose your own adventure situation.
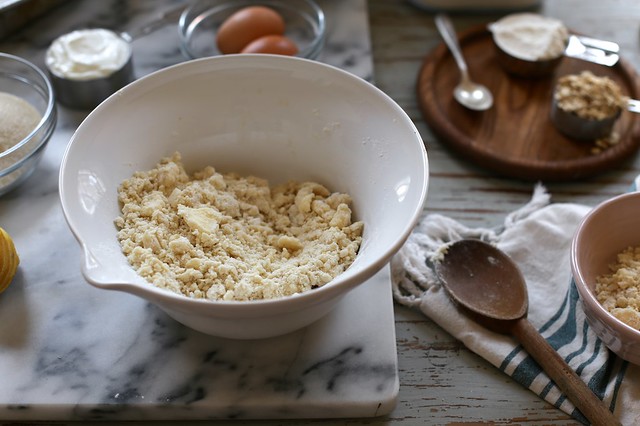
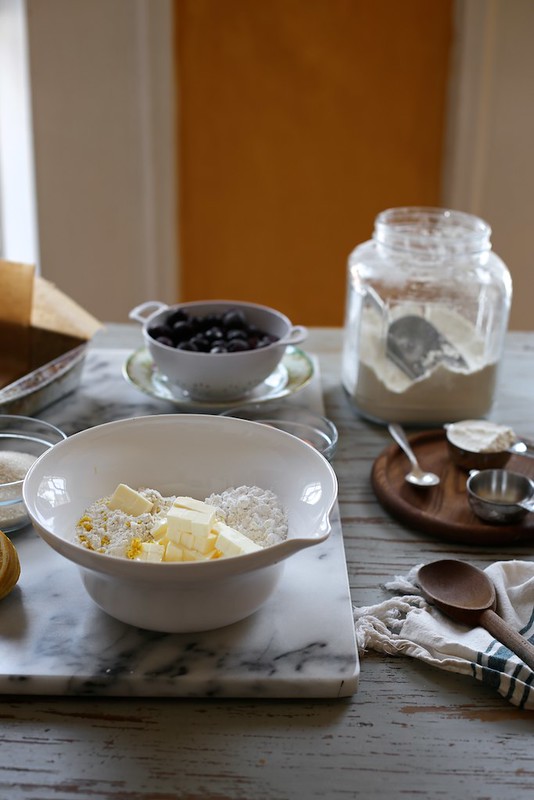
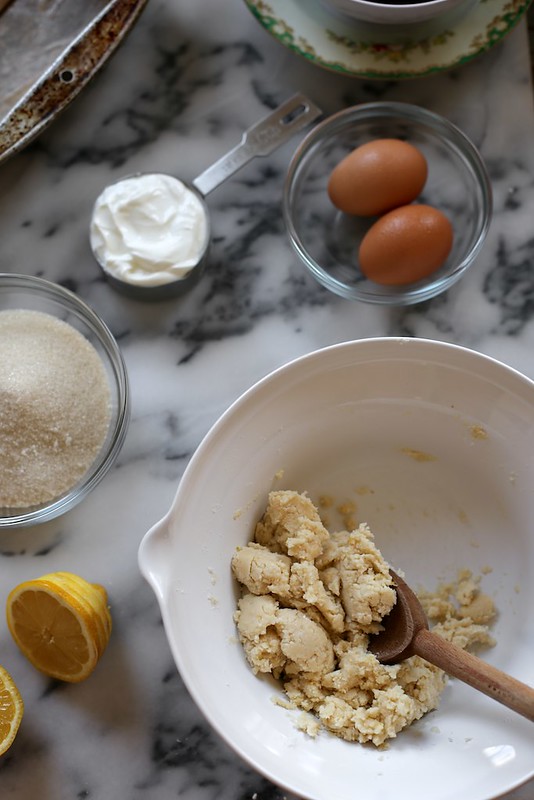
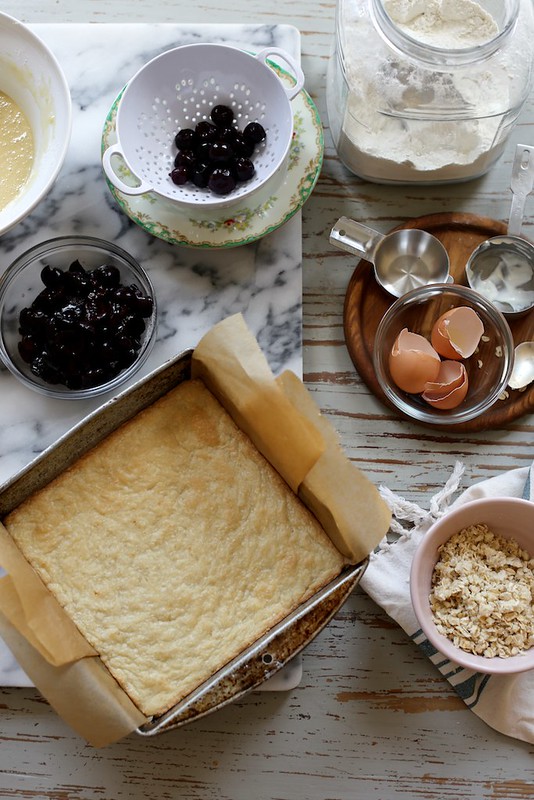
Softened butter is worked into a flour and powdered sugar mixture.
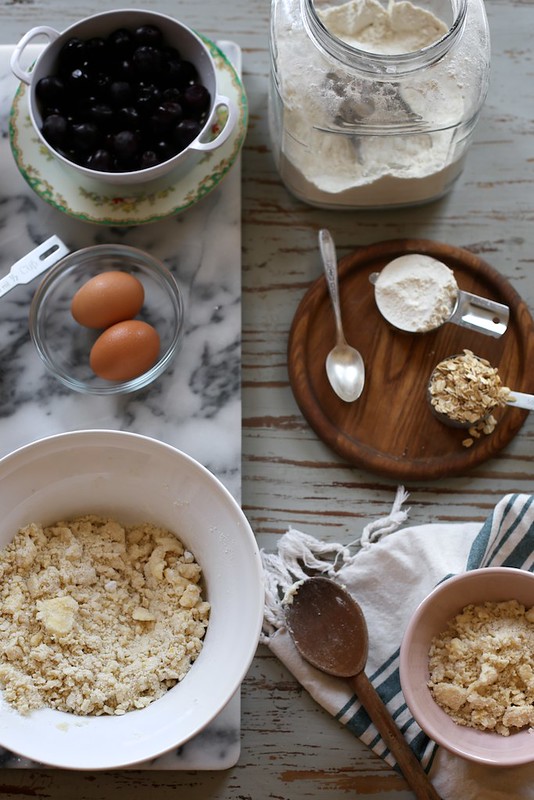
Once the dough is crumbly (like a really soft pie dough before the buttermilk is added) we separate about 1/2 cup of the shaggy crust into a small bowl.
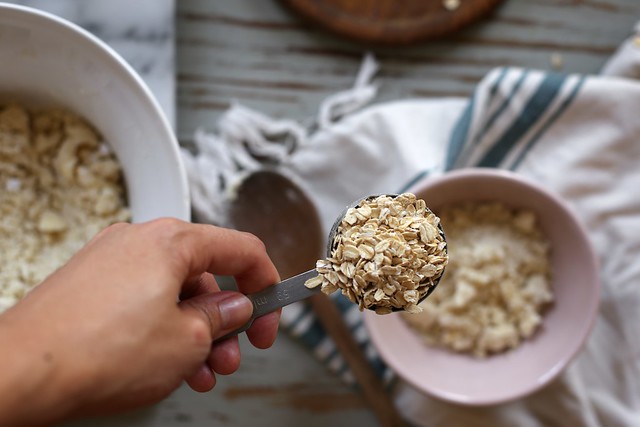
And we add some oats!
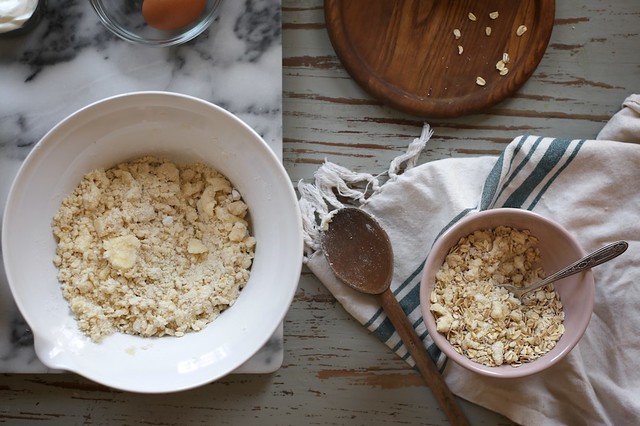
We have a crumbly, buttery oat topping. Just like that!
Oat topping is set aside and the rest of the crust is mixed more, creating a shaggy but well incorporated dough. No big patches of butter. It’s all mixed together.
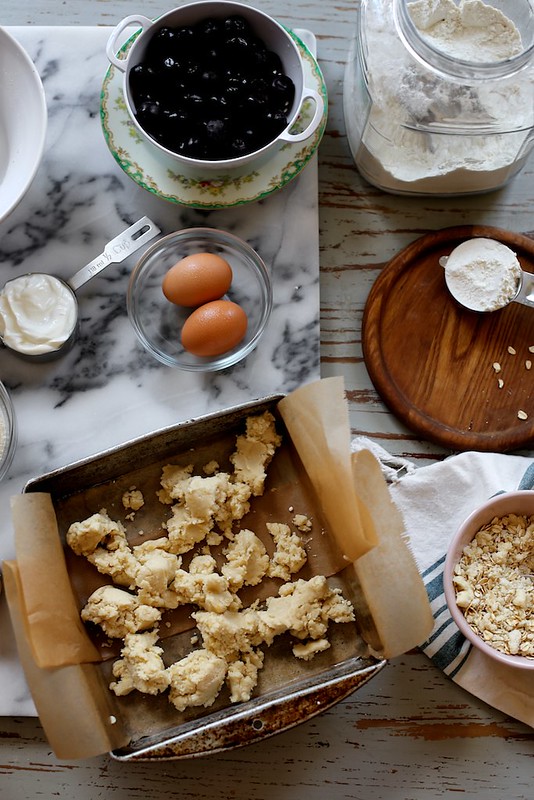
The baking pan is lined and greased. This makes it muuuuch easier to remove the bars once they’re baked.
The dough is distributed across the pan. It’s chunky. That’s right.
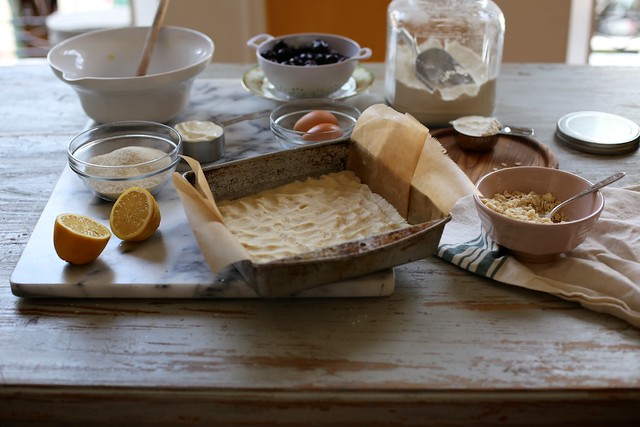
We flour our fingers just a bit, and press the dough across the bottom of the pan.

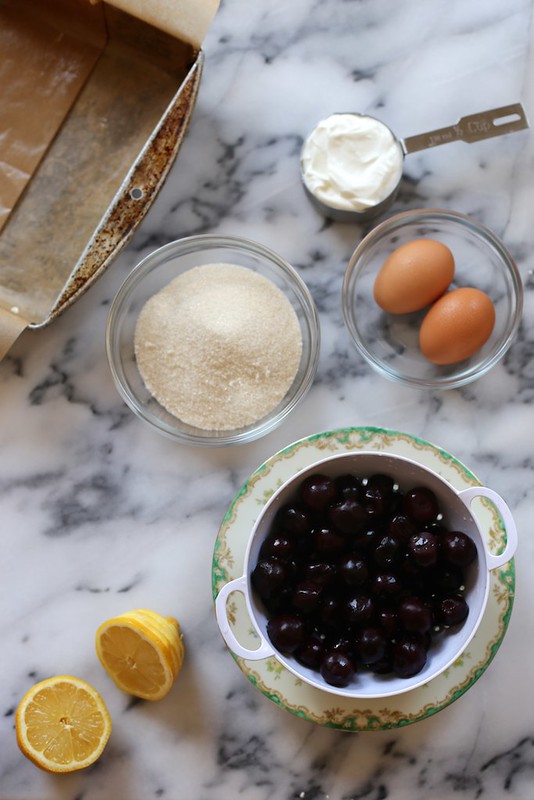
The crust goes away to bake and the simple, creamy filling is whisked together.
We’re combining lemon, sugar, and eggs. Flour, too. Yogurt for extra creaminess.
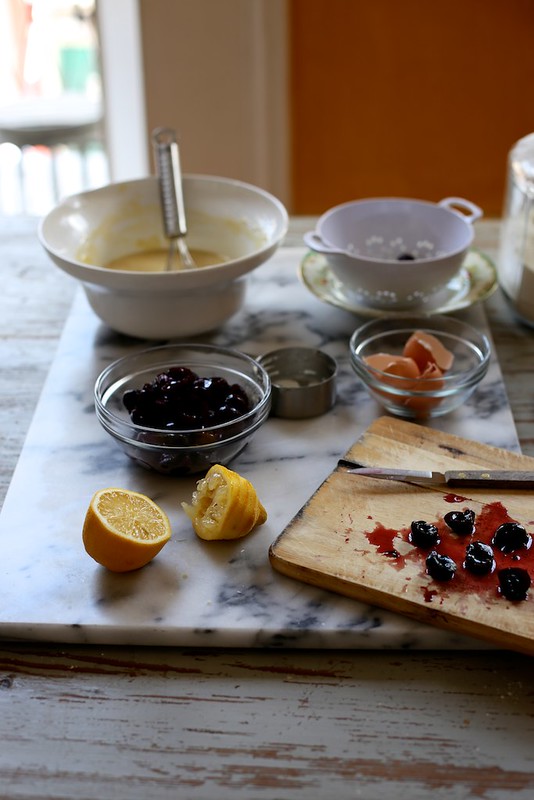
Cherries are thawed and sliced.
Sure… it’s a little messy.
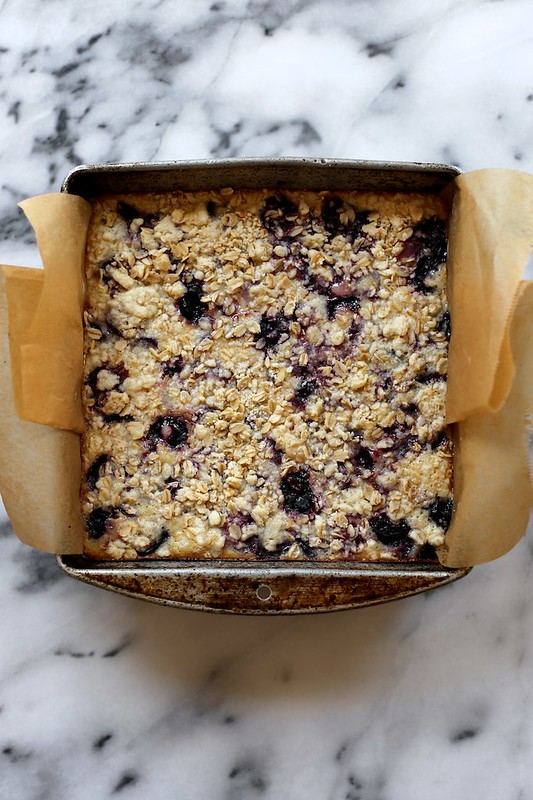
Our crust is baked and golden brown. The filling is ready. The topping is ready to show off.
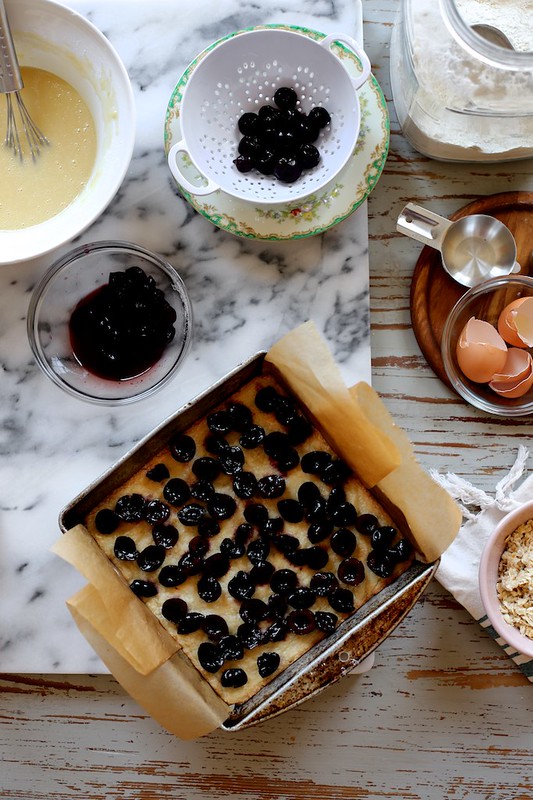
The cherries are placed over the baked crust.
I like to do this by hand to get the cherries without the thawed cherry juice. You know?
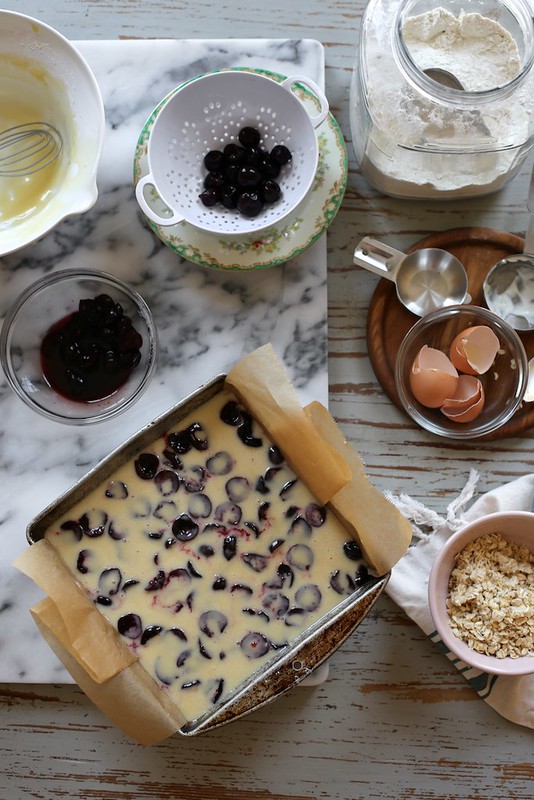
On goes the creamy lemon filling!
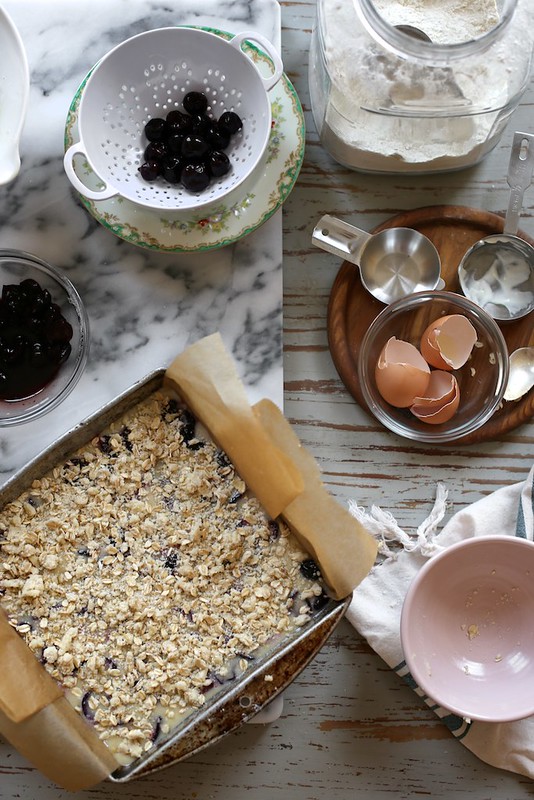
On goes the oat topping!
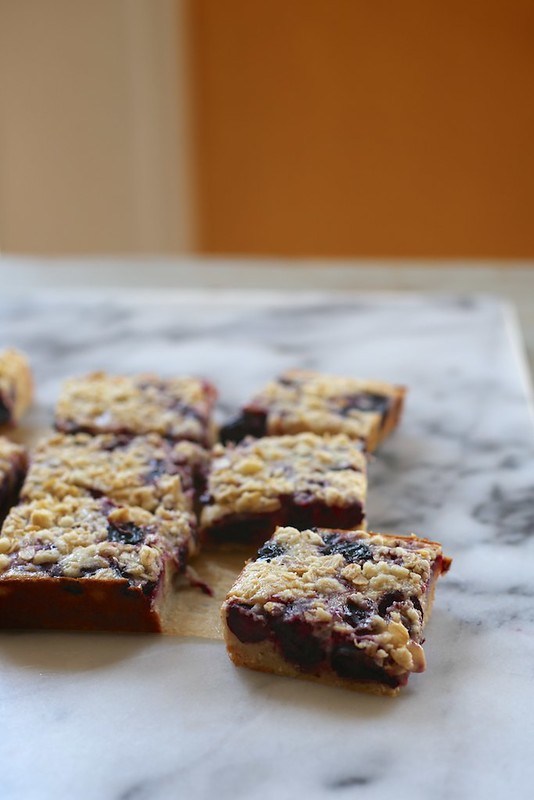
Baked up just right!
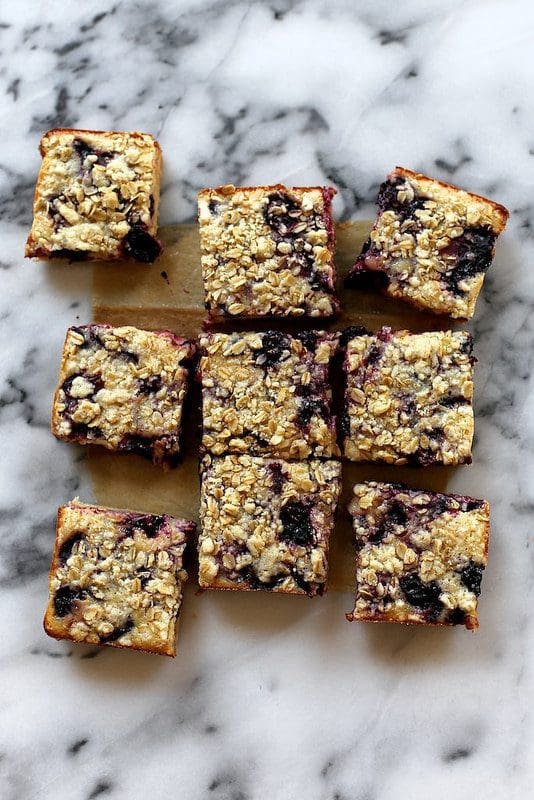
The bars are generously studded with fruit, with just a bit of gooeyness from the lemon filling.
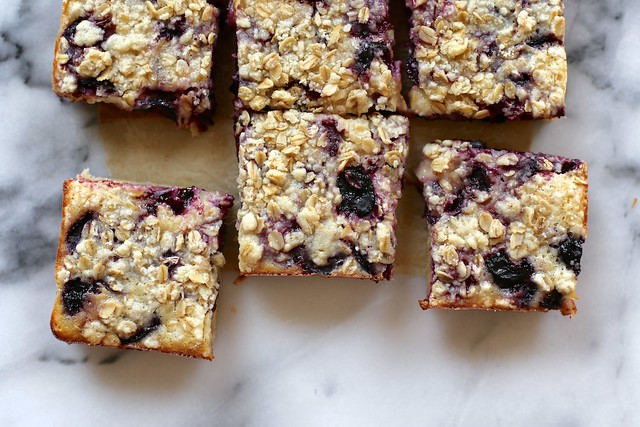
The oat topping adds a bit of bite, and these crisp golden edges are absolutely the best!
Let’s think of these bars as lemon bars with loads of sweet cherries! Just like lemon bars, I like these best served cold from the fridge.
Helps with the heat. For real, though…
Cherry Pie Bars
makes 1 9×9-inch pan
For the Crust:
3/4 cup (1 1/2 sticks) unsalted butter, softened to room temperature
3/4 cup powdered sugar
1 1/2 cup all-purpose flour
1/4 teaspoon salt
1 teaspoon lemon zest
1/4 cup old-fashioned oats
For the Filling:
2 large eggs
3/4 cup granulated sugar
1/3 cup all-purpose flour
1/2 cup Greek yogurt or sour cream
2 tablespoons fresh lemon juice
1/4 teaspoon salt
1 1/2 cups frozen cherries, thawed, drained, and cut in half
Place a rack in the upper third of the oven and preheat oven to 350 degrees F. Grease a 9×9-inch baking pan, line with parchment paper (so that it over hangs slightly from the pan) and grease the parchment paper. Set aside.
To make the crust, in a medium bowl combine butter, powdered sugar, flour, salt, and lemon zest. Use your fingers (which could get messy) or a wooden spoon to work the mixture into a shaggy dough. Big bits of butter will remain and the flour won’t be entirely incorporated That’s perfect. Separate 1/2 cup of the shaggy dough and place it in a small bowl and add the oats. Work the oats into the mixture to create a crumble. Set aside.
With the remaining dough, continue to stir with the spoon until it forms a homogenous ball of soft dough. Place the dough in large chunks in the prepared pan. Add a bit of flour to your fingers and press the dough across the bottom of the pan in an even layer.
Bake the dough for 12 to 15 minutes until browned around the edges. While the crust bakes, assemble the filling.
To make the filling, in a medium bowl (I used the same bowl I made the crust in) whisk together eggs, sugar, flour, lemon juice, yogurt, and salt. Whisk until smooth and well incorporated.
Carefully place drained cherry halves across the baked crust. I did this one by one to ensure that I was getting just cherry and not a bunch of juice. This won’t be a problem if you’re using fresh cherries but frozen cherries must be thawed and well-drained. Place cherries across the surface of the baked crust and slowly pour the lemon filling over the cherries. Sprinkle the oat topping over the filling.
Bake for 25 to 30 minutes or until set through. Give the pan a light shake and if the mixture is still very wavy in the center allow it to make for a few minutes long. A little jiggle is ok.
Cool to room temperature and chill for an hour before slicing. I prefer these bars served chilled, but room temperature is also nice. Store the bars, well wrapped in the refrigerator for up to 4 days.


